Archive for August, 2014

With fall weather fast approaching, it is again time for the autumn Washing of the Wool. This is a semi-annual event around here; everything gets one good wash on the way into storage in the spring and on the way out of it in the fall.

I wish I could cut that down to just one washing in the spring, since you wouldn’t think that wool would need another wash after sitting in a plastic bin for the summer, but I am quite allergic to dust mites and often find that natural fibers need a wash after being stored for a month or two. I’ve also been shocked at how much extra dirt comes out on a second washing, especially for sweaters that we wear all the time. At first I thought it was just dye leaking, but even our natural fibers managed to get the water pretty dirty, considering that they were washed thoroughly (or so I thought) just before they were put away.

The autumn washing also gives me a chance to go over everything with a careful eye to check for pulls, stains, and (heaven forbid) nibbles from insects that might have happened in the previous year of use. This year, I am also putting my Gleaner to good use depilling some fabrics that sorely need it.

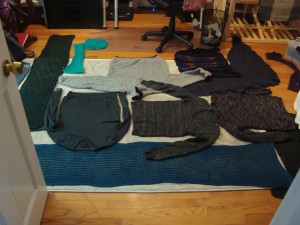
The Washing of the Wool started out as a small, informal event, but has grown in size each year that I’ve done it. At this point, I think it merits capital letters in the title. For the past week, my office floor has looked like this almost every night:

The colors vary, of course, but I’ve managed to cover the whole floor with knitted items several times over. (I’m also washing my commercial wool sweaters, but most of it is handknits.) I think tonight will be the 5th load, and we’re finally getting close enough to see the end.

Last night, I was laying out the latest load and noticed my dressform standing in the corner. My striped shawl sweater is a challenge to block every year. I was running on yarn fumes at the end, and didn’t add as much ease to the hips as I normally would, and that combines with the natural shape of the unusual construction to make it difficult to block to a shape that’s 100% comfortable to wear. It’s also a form fitting sweater, which I loved at the time that I knit it, but lately I’ve been leaning more toward looser knits. (Surely I’m not the only one who swings wildly back and forth in style and fit from year to year?)

Last year, I blocked the sweater once, and it was much tighter than I wanted. So, I blocked it again firmly with lots of pins (I never use pins for sweaters), and then put it on while it was still slightly damp to let it dry to form. This helped a lot, but I ended up with zero ease around the hips, since it was my body that determined the final shape. In the end, it hugged my hips more than I wanted, and last year I hardly wore it at all.

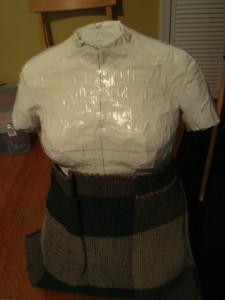
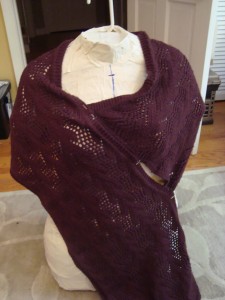
When I saw the dressform standing there looking on, it occurred to me that this might be a way to block the sweater to the fit I want and avoid the not entirely pleasant process of wearing wet wool to shape it to my body. I wrapped her hips in rag rugs to add some extra bulk for ease (sorry for the dark photo, but there’s not all that much to see…)

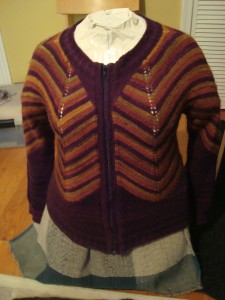
and then zipped the sweater on.

24 hours of drying later, I think that this is the best blocking I’ve ever gotten for this sweater. The fabric actually has the give it needs to stretch, but it’s next to impossible to pin it out flat in a way that will get me there. The 3D dressform worked perfectly, and the rag rugs ensured that there’s enough room left over for a heavy shirt and pair of jeans underneath. Only time will tell if that helps to encourage me to actually wear the sweater this fall, but for now I am pretty thrilled with how the blocking turned out.

I will also be thrilled when this wool washing is over. Only 2 loads left to go?
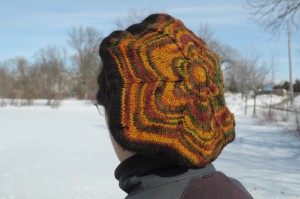
Remember this?

Quite possibly not, I imagine. I wrote a pattern for this hat way back in 2010, which has since been sitting on my hard drive waiting for a final edit (yes, I needed to count stitches. It was terribly hard, and took all of 10 minutes).

I’m hoping that it will finally see the light of day this fall. Anyone interested in a test knit, to be finished by mid-September?

(If this one doesn’t grab you, stay tuned…I am hoping to have another coming out soon, but we all know how that goes…)

Edited to add: I am also still looking for a unique pattern name for this hat…suggestions are welcome!

In my current quest for a quick finish, I decided to take a little detour from knitting and work on some sewing for a while. With a simple pattern, you can have a sewn garment in a matter of hours, where a knitted one would take at least days if not weeks. Of course, being me, I didn’t take the simple route, even if I did choose a simple pattern.

My friend Heidi came over last week for some fiber play (we took a turn on her spinning wheel, mixed some batts, and generally had some fiber fun). She was wearing an embroidered linen tunic with a really simple construction that struck me as something that would be easy to make.

You might remember that sewing with handwoven fabrics is one of my long-term goals, and this shirt seemed like a really good candidate for handwovens. Minimal shaping and very basic design would make it an easy starter garment, and the rustic feel would work well with a coarse handwoven fabric. So, I set out to see what I could do.

Rather than start with a handwoven, I figured I’d develop the pattern with a commercial fabric. A quick trip to Joann’s got me a linen look blend, which has a slightly rustic feel but a nice weight and drape to it. It also has a pronounced simple weave structure, which is ideal for doing embroidery.

It’s been a long time since I’ve done pattern development from scratch. Twelve years ago I could have drafted a pattern in one go that would have worked, but my body has changed since then and my skills are a little rusty, so I decided to start out by using a little bit of a template.

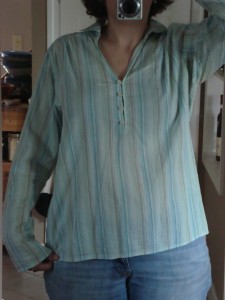
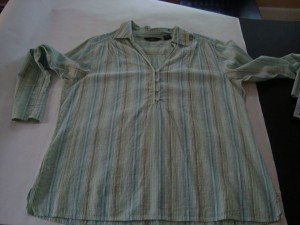
I found a shirt in my closet with a fit that was kind of close to what I was going for, and started from there.

First, I laid the shirt out flat and traced the main body pieces onto paper, paying special attention to the armhole shaping.

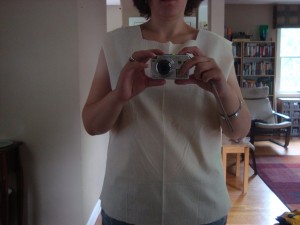
After a bit of fussing with curves and adjusting the neckline to fit the design I wanted to make, I cut a muslin from scrap fabric.

This let me get my hands on the 3D garment and start planning how I’d deal with the shaping. I checked out how the new neckline worked, and figured out how the garment would hang with the adjustments I’d made. Once the basic body shape was roughed up, I turned my attention to the accent details that I wanted to be the focus of the garment.

I had a picture in my mind of a set of embroidered gathers as the main decorative and shaping element for the piece. I wanted something that would match the rustic cut of the garment, and that would let me do the shaping I needed without cutting the fabric. I also needed to see what the gathers would do to the 3D shape of the fabric.

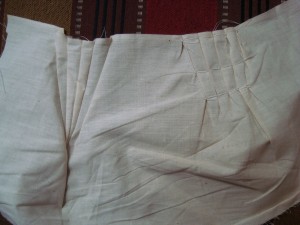
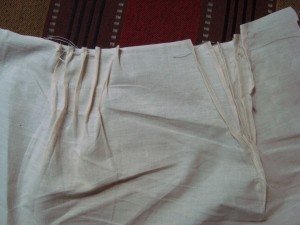
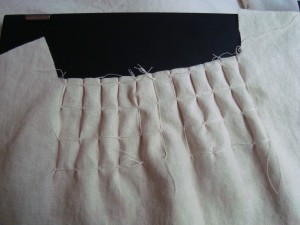
First, I started with paper. I cut out a shape that roughly matched my neckline and started folding to see what did (and didn’t) work, and what size of gather gave me the amount of take up that I’d need in the end. Then, I took a couple of designs that I liked most and sampled them out on scrap fabric. This let me see how the gathers looked in actual fabric (without the benefit of any ironing or finishing techniques), and it let me try them on to see how the contours matched the actual shape of my body.

It turned out that this was a good idea, because both of the gathered patterns ended up making a strange point in the fabric that I wouldn’t have wanted in the middle of my chest. Placed more to the sides of the neck opening, that bump actually helped with the bust shaping. With feedback from the “swatches,” I went back and made the front of the actual garment, in the final fabric.

The gathers here are only placeholders, sewn in by hand as a temporary measure while I figure out the garment construction.

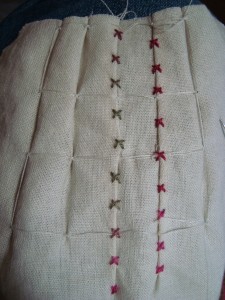
Eventually, I wanted to add embroidered details, and I had a leaning toward cross stitch. As I was wandering around my office, I noticed a weaving bobbin full of yarn that I’d used on a previous project. I really liked the colors, and the silk thread was about the right weight for the details I was looking for. So, I decided to try that in the swatch.

I really liked what I was getting, and the color changes of the variegated yarn sold me on using this one if I could. However, this is a knitting yarn made of silk, dyed in fairly intense colors. All of those things mean that it’s not optimized for embroidery. Most importantly, I wasn’t sure how colorfast it would be. That’s especially important when you’re stitching onto an off-white fabric, so I decided to do another test on the swatch.

I don’t really plan to wash this garment in hot water, but I wanted a margin of safety just in case. So, I washed the swatch in hot water, and this is how it came out.

Definitely glad that this wasn’t the actual garment!

My options at this point were either to change the thread, or to find a way to reduce the bleeding. Silk yarns (and especially ones with intense colors) often have extra dye in them that isn’t discharged during the dye process, but they’re often colorfast once that extra dye is released. With that in mind, I took a small skein of the yarn, and soaked it in hot water multiple times. Each time, the amount of dye released seemed to reduce, and the amount that blotted off onto a paper towel had almost disappeared after about 5 washes.

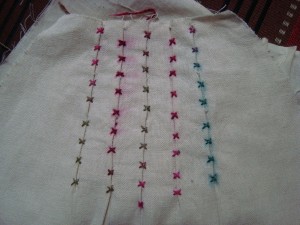
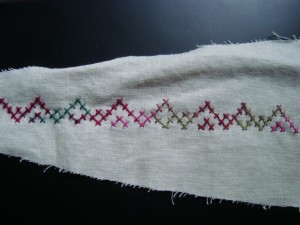
I started a new swatch to play with the hem accent design, and to test the wash fastness of the prewashed yarn. Here it is, after two washes (one in cold water, one in hot).

There’s still a tiny bit of bleeding on the hot water wash, but not nearly as much as the first time, so I think it’s probably safe to use.

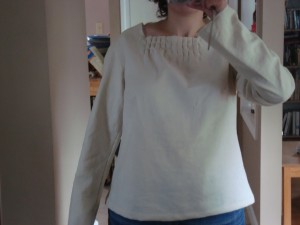
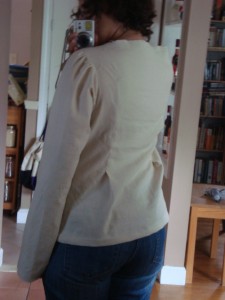
Yesterday, I added some sleeves, finished up the back shaping, and sewed the hems on the garment itself.

At this point, all that’s left is finishing the neckline and adding the embroidery. Not exactly a quick finish, but it was fun to change gears for a while and polish up some rusty skills!

I don’t know about where you are, but here in Massachusetts we’re beginning to see the signs of fall. The maple seeds are browning up and falling from the trees. My bleeding hearts are yellowing and going into hibernation for the winter. The days are getting shorter, and there’s an unmistakable chill in the air. Usually we’d be in the middle of a heat wave around this time, but this year it seems that fall is coming more gently, and early.

To me, that means two things. First, summer is almost over, and a new semester is upon us. Any crafting time I want before the school year starts has to happen now, or not happen at all. It also means that it’s almost time to wear warm things again, so I’d better get knitting.

The Kneon cowl is coming along nicely at last. I’m well past the point where I pulled back, but you’d never be able to tell it from the photo. That’s how it is with moebius knitting; you just can’t see how far you’re getting until all of a sudden you’re done. At least it makes a nice, small project to take on the train to work with me on the days that I’m going in to campus.

The tiny needles and invisible progress weren’t helping with my sense of building pressure to make warm things, though. So, I returned to a project that had stalled, and started over.

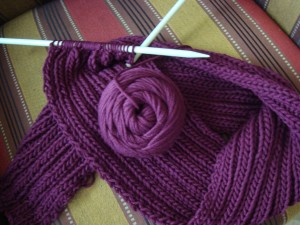
I bought this yarn this spring from Coveted Yarn. It’s Plymouth Yarns Chunky Merino Superwash, and it is huge. I never knit bulky yarn or on big needles, so it’s amazing to me that I can polish off a ball of this in just a couple of hours. I abandoned the hexagon lace pattern that I’d been using before in favor of a simple 2×2 rib, and I’m really happy with the change. The lace just wasn’t popping the way I’d hoped it would, and the ribbing is working really well with the yarn.

I realized about 3/4 of a skein in that I could actually have gone back to my original width on the scarf (I’d decreased because the lace was eating up yarn too fast), but decided to just keep going full steam ahead. It means that I’ll probably have a skein left over and the scarf won’t be quite as wide as I’d like, but this is a project for progress.

The size 13 needles really do help with the progress, too. My hands don’t quite know what to do with needles that big, but the fabric is coming out beautifully at the looser gauge. There’s at least some hope that I’ll have one project done in time for fall!

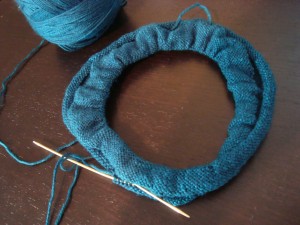
I think I’ve settled on a design that will work for the Kneon project. I’m going to base the construction on the Harmonia’s Rings cowl by Sivia Harding. That way, I get the drape and shape of a moebius, but can knit the slip stitch neon pattern in the round without exposing the back side. The cowl will have a much narrower neck opening which will use less yarn, and I’ll still get the wide accent band that I was hoping for. The finished item will be somewhere between a cowl and a capelet, and should do a nice job of keeping my shoulders warm at work. Perfect, right?

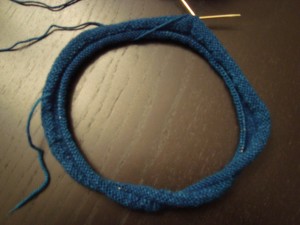
The only problem seems to be getting it started. The first time I cast on, I made the neck opening too small. The second time, I miscounted the stitches. The third time, the stitches were right, and I knit happily along for a few hours. When the fabric got long enough, I stopped to have a closer look at how it was coming out.

Note that there are not one but two twists in that moebius. I didn’t even know that it was possible to twist a moebius cast on. But, here we are, back at the frogging stage again.

Fortunately, I haven’t gotten that far, so it’s not that big of a deal to rip back, though the yarn is starting to show the wear a bit, and I’d like to move from process to product knitting at some stage!

This is one of those moments where the universe is either throwing up a big “do not enter” sign, or it’s testing your persistence on the way to a great finish. I’m choosing to believe the latter, and hoping that this project has not been doomed from the start!

I do believe this is the world’s most-swatched project. The last post was #4 or 5, and I’m counting the corner as a separate swatch, even if I didn’t cast on and knit it separately (I didn’t want to break the yarn, as I intend to frog and re-knit it).

The only thing more fun than knitting fabrics on three different needle sizes* to get the right gauge is knitting three fabrics and working out the corner decreases to make an flat mitered corner in a stockinette-base fabric.

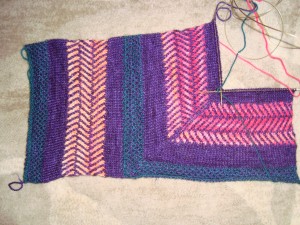
As you can see, the miter didn’t turn out to be a perfect 90 degrees, but I’m calling it close enough for garment design.

The decreases actually turned out to be easier than I expected, though I went the wrong way at first and decreased more slowly than a garter stitch mitered corner when I should have decreased faster. Turns out that decreasing every other row and alternating between 2 and 3 stitches per decrease row is just about right for the stockinette section. I decreased 2 stitches every other row for the linen stitch, and 2 stitches for every purple row in the slipped stitch section. I’m not sure how to count that one; each “row” is knit twice – once with the neon yarn, and once with the purple – and the other yarn is slipped. If this were fairisle, you’d knit both yarns at the same time and call it a single row, but that was too fiddly to be worthwhile with the crossed stitches, so I stuck to knitting one at a time and slipping the other. So if I knit each row twice, and decrease the second time that I knit it, does that count as decreasing once per row?

With all that decreasing going on, I was also noticing the yarn balls shrinking at a fairly alarming rate, so it came in handy to have a huge swatch so that I can calculate how much knitted fabric I can expect to get from these three skeins. The swatch itself is 8 x 15″ (minus a corner). That’s a total of about 104 square inches. So far, I’ve used 45 g of my base colors, and I have a total of  175 g left. That puts me at (very roughly) 512 square inches possible for the total piece. (I should actually get a little bit more than that, since I’m not accounting for the neon yarn in that calculation.) Still, 512 square inches is not a lot.

The top contender for the final design was the Poncho Cowl by Stephen Berg, which is basically knit flat as a rectangle and then seamed. I’d rather knit this pattern in the round, and I didn’t want to have a break in the neon herringbone, so I went ahead and figured out how to turn the corner while knitting (see swatch above). Then it’s just a matter of figuring out how big the rectangle needs to be. I pressed a different scarf into service, pinned it up on my dress form, and made the opening significantly shorter than shown in the pattern photo to reduce the overall length. It came out as 14 x 48″, or 672 square inches.

That’s 31% more inches than I have yarn. To actually have enough yarn, I’d need to decrease the width to about 10 inches, which would make it more like a scarf and less like a poncho/shawl.

So, we are back to the drawing board again. Both Teresa and Jan have suggested a circular cowl, and right now that’s sounding like the most practical option. A 24 inch (hem) cowl  could be about 21″ wide with the yarn I have, which would be more than enough.

I’m thinking that this one needs a little more time to percolate. Perhaps I’d better go come up with something else to swatch…

*000, 00, and zero. Because some day I will find myself really wishing I’d written it down.