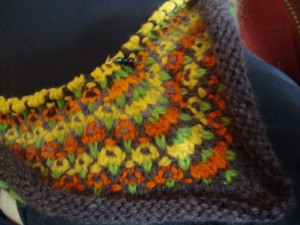
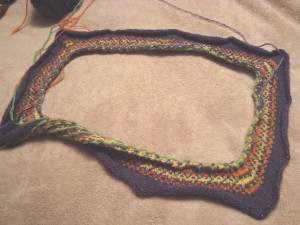
We’re down to yarn fumes on the mink scarf, so I’m scrambling a bit to get the next project lined up. I spun up the 2 oz of fiber that I picked up at Steven Be’s in Minneapolis, which rounds out my collection of colors for the crocus sweater.
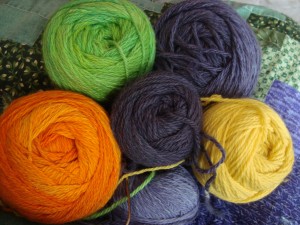
Now, all I have left to do is to choose a stitch pattern. In wandering through my pattern books, the multi-color slip stitch patterns have been catching my eye, so I started out with one of those. I didn’t love the way it worked straight out of the book (the first few rows of the colorwork pattern in the swatch), but have been working in some modifications and am liking it much better now. The top three repeats (close to the needle) are my favorites so far, and with some careful color sequencing I think we have a winner.
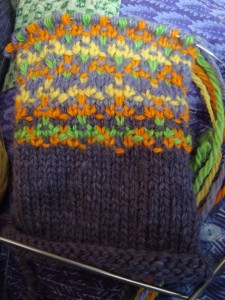
Of course, me being me, I knit those last three repeats with no idea of what it was that I was actually doing. I slipped into my usual knitting trance, and just kind of let my hands do their thing. I knit with one color when it felt like the right time, and knit with the other when I felt like it. I slipped some stitches with yarn in front, and some with yarn in back, when the pattern seemed to need only really paying attention to what was happening in the row below. This worked just great until I decided that I liked the pattern and wanted to write it down, at which point I promptly lost all sense of what I’d been doing. Then, I spent about 3 hours figuring out how to knit the next 4 rows.
I decided to chart the pattern out, partly for future reference, partly because we haven’t had a process-y post in a while and I thought it might be fun, and partly so that I could play with my colored pencils.
(That last one might have been the factor that tipped the scales in favor of documentation.)
So, now that I’ve figured out what on earth it was that I was doing, let me explain it as though I knew what was happening all along.
Here is the original slip stitch pattern for the Flecked Tweed from the 3rd Walker Book (p 229):
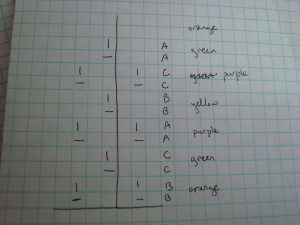
It’s a very simple pattern; you slip with the yarn in front for a horizontal bar, and with the yarn in back for a vertical bar. You work two rows in each color (knitting with only one color at a time). Here’s the color version of that first chart. The squares with a front-slipped stitch are colored with the working yarn, and with the color from the previous row, since the float looks like it cuts the slipped stitch in half in the actual swatch. The key at the right end of each row shows the colors of the working yarn(s) for that row.
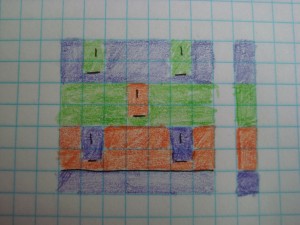
That gives you this:
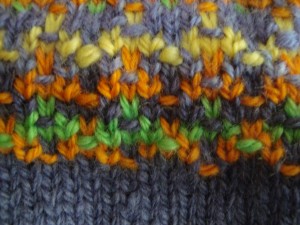
Like I said, I wasn’t in love with this version. I thought it muddied up the colors too much, but I loved the tiny little flower that were peeking out of the pattern (in green for those first few rows). I played around a bit, with the next repeat, and suddenly the green slipped stitch turned into little stems (orange flowers in the second pattern repeat). In this pattern, though, all of the flowers in the motif ended up stacked on top of each other, and I liked them better staggered, like in the original pattern. I wanted the stems, but I didn’t want them to shift my flower pattern by a full repeat each time.
Next, I tried adding an extra row of background color in between, and shifting the flowers. That didn’t work at all, and I frogged it. Â I looked back at the original pattern, and realized that I really didn’t like the green flowers – IÂ only wanted the stems. So I started thinking about ways that I could keep the green slipped stitches in the fabric without the rows of three knits and a front-slip. In the end, I decided to knit one row with two colors, stranding the green and knitting and slipping with the purple background color. That meant that the green got incorporated into the purple background rows, which maintained the stagger in the flower patterns, and it gave me a single green knit stitch to become the slipped-stitch stem. The new chart looked like this (squares in the key with two colors indicate rows where I used stranded knitting in addition to slipped stitches):
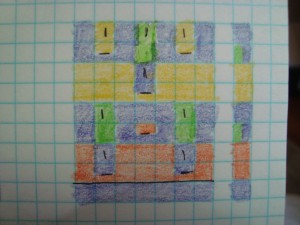
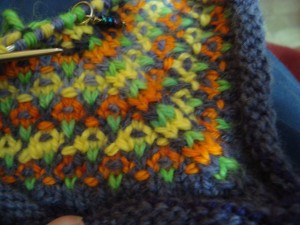
And the new swatch looked like this:
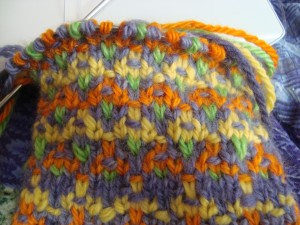
Up close, they look like little flowers with tiny green stems. From further away, they look more like an abstract triangle motif, which I also like. Of course, my flowers aren’t purple crocuses as I had hoped, but I think that this gets pretty close to what I’m looking for. I blended three different shades of purple for the colorwork band, so the background can fade from one to the other across the stripe. Overall, I’m pretty pleased with how this is shaping up.
The one drawback to this design is that the flowers face in the direction of the knitting, which means that I need to knit the sweater from the bottom up to make them face the right way. That’s kind of a problem because I am close on yardage and would rather be able to stop and assess yarn usage along the way. I haven’t quite decided how to deal with that one, but I’m thinking I might use a provisional cast on, knit the yoke and shoulders, and then unpick the cast on and pick up stitches to finish the body. That way I can knit the yoke with the flowers facing upward, and then knit the rest of the body in the direction that I prefer. I’ve never done a piece-wise sweater in quite this way before, which would make it an interesting adventure, and it means that I’ll start with the widest part of the sweater and decrease my stitch counts from there. It’s always nice when the row count goes downhill. The only challenge is figuring out how many stitches to cast on around the widest part of the yoke…
